
Stains have an incredible ability to appear at the most inconvenient moments — a rushed morning coffee, a leaky pen in your bag, kids coming home with grass-stained knees, a splash of tomato sauce while cooking, or a pet accident on the living room rug. And while stains often look intimidating, the truth is this: most stains are removable if treated correctly, and most “permanent stains” only happen because they were cleaned the wrong way.
People scrub when they should blot. They use hot water on stains that require cold. They apply bleach to fabrics that should never be bleached. Or worse, they mix cleaning agents that should never be combined. With the right approach, more than 90% of stains — yes, even tough ones like ink, wine, or grease — can be lifted safely.
This encyclopedia is designed to be your forever reference. It covers everything:
- how stains behave,
- what NOT to do,
- how to safely clean each type,
- how to identify stains when you don’t know the source,
- and quick printable cheat sheets for real life emergencies.
If you want to explore more home-care guides, you can also check:
➡️ Kitchen Cleaning Master Guide
➡️ Stainless Steel Sink & Appliances Guide
Let’s begin your journey into stain mastery.
Stain Removal Basics — What Everyone Should Know First
Fresh Stains Are Always Easier Than Old Stains
Stains are easiest to remove when they are still wet because the molecules haven’t fully bonded with the fabric fibers. Once a stain dries, it settles deeper and becomes more chemically attached, making removal harder — but not impossible. Acting quickly can make the difference between a 5-minute fix and a 5-hour struggle.
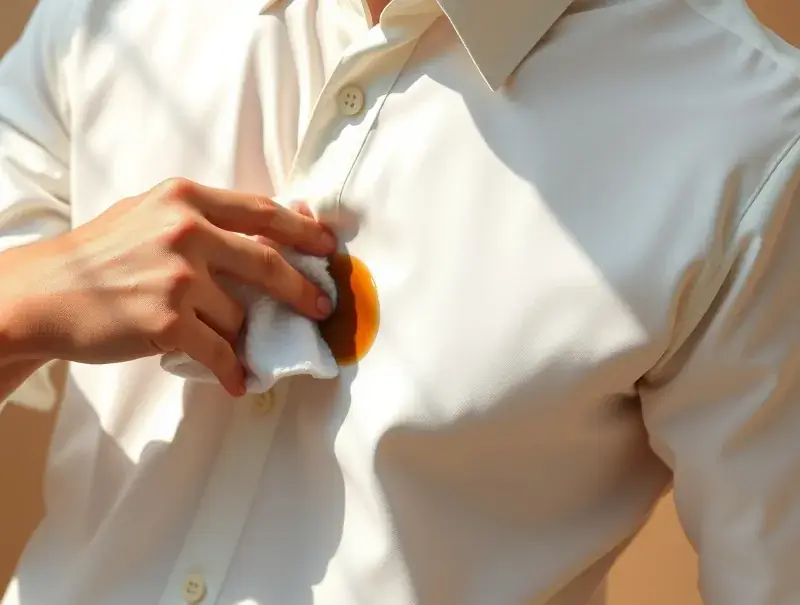
Blot, Don’t Rub
Rubbing pushes the stain deeper into the fabric and enlarges the stain’s diameter. Blotting, on the other hand, lifts the stain upward. Use gentle pressure with a clean microfiber cloth, working from the outer edges inward.
Know Your Fabric Type Before Using Any Cleaner
Different fabrics react differently to chemicals, heat, and water:
- Cotton is durable and responds well to most methods.
- Polyester resists staining but can melt under high heat.
- Wool shrinks under heat and agitation.
- Silk is delicate and easily discolored.
- Linen can weaken if soaked for too long.
Whenever a fabric is delicate, always begin with the mildest method first.
Hot Water vs Cold Water — A Critical Decision
Water temperature determines your success:
- Cold water is essential for protein stains (blood, sweat, milk, eggs). Heat sets them permanently.
- Warm water helps dissolve grease and oily stains.
- Cool or room temperature water is best for dye-based stains (coffee, wine).
If you’re unsure, always start with cold water — it’s the safest.
Always Test Before Using Harsh Chemicals
Products like hydrogen peroxide, rubbing alcohol, acetone, or bleach can damage or discolor certain fabrics. Test on a hidden seam first to make sure the fabric tolerates the treatment.
Stain Identification Guide — What If You Don’t Know the Stain?
Sometimes the hardest part of stain removal is simply not knowing what caused it. Maybe you found an old stain on laundry day, a mysterious mark on upholstery, or a stain on your kid’s clothes after school. Identifying the stain type makes the cleaning method much more effective.
Here’s how to “read” a stain like a professional.
How to Identify Protein Stains (Blood, Sweat, Milk, Eggs)
Protein stains tend to:
- Have a stiff or crusty texture
- Appear off-white, yellowish, brown, or rusty-red
- Harden as they dry
- React badly to heat (turn darker or set stronger)
If the stain becomes slimy when wet again, it’s very likely protein-based.
How to Identify Grease or Oil Stains
Oil stains usually:
- Appear darker or slightly shiny compared to surrounding fabric
- Spread outward over time
- Feel slippery or slightly sticky
- Leave a translucent ring when held to the light
Touching with dry tissue helps — if it leaves a transparent spot on the tissue, it’s oil.
How to Identify Dye or Color Stains (Wine, Juice, Coffee, Ink)
These stains often:
- Have vivid or deep color
- Bleed when exposed to water
- Spread quickly if rubbed
- Are more visible on light fabrics
If water immediately reactivates the pigment, it’s dye-based.
How to Identify Plant/Organic Stains (Grass, Fruit)
Plant stains:
- Are typically green, pink, purple, or bright-colored
- Bind strongly to cotton
- Come from natural pigments like chlorophyll or anthocyanin
- Often leave “shadow stains” even after washing once
How to Identify Unknown Old Stains
Old stains often:
- Turn yellow or brown
- Have hardened edges
- Become part of the fabric’s texture
- Require both soaking and agitation
In this case, the safest “unknown stain method” is:
- Start with cold water soak
- Apply dish soap (safe for oil & protein)
- Treat remaining dye with vinegar or oxygen bleach
When the original stain source is unclear, avoid heat until stain is gone.
Stain Categories — The 12 Major Types & How They Behave
To remove stains effectively, you must understand how they behave on a molecular level. Every stain belongs to one or more categories below — and each requires a different cleaning approach. When you know whether a stain is protein-based, oil-based, dye-based, or a combination, you instantly know what method will work and what will make the stain worse.
1. Beverage Stains (Tea, Coffee, Wine, Soda)
Beverage stains are tannin-based, meaning they contain plant pigments that cling to fabric fibers. These pigments can appear light at first but darken as they oxidize, making older beverage stains more stubborn. They also react unpredictably to alkaline cleaners, which is why harsh detergents or hot water should be avoided initially. Stains like red wine contain additional sugars, which caramelize into the fabric when exposed to heat. Treating beverage stains promptly with mild cleaners gives you the best chance at a full removal.
For deeper guidance, see ➡️ How to Remove Beverage Stains
2. Oil & Grease Stains
Oil stains behave differently because they don’t dissolve in water at all. They cling to fibers and spread outward, creating translucent halos. These stains require emulsifiers, like dish soap, that break down oil molecules into smaller components that can be rinsed away. If left untreated, oil stains oxidize over time, turning yellow and becoming nearly impossible to remove. Warm water helps loosen oils, but heat should be used with caution depending on fabric type.
Detailed guide ➡️ How to Remove Grease & Oil Stains
3. Ink & Marker Stains

Ink stains are composed of dyes suspended in liquid solvents. When they touch fabric, the dye molecules penetrate deeply, making ink one of the hardest stains to remove. Water alone usually spreads the stain further because ink is formulated to be water-resistant. Solvents like rubbing alcohol are necessary to dissolve the pigment bonds. Acting quickly makes a huge difference, but even older ink stains can often be lifted with repeated blotting. Full method ➡️ How to Remove Ink & Marker Stains
4. Protein Stains (Blood, Sweat, Milk, Eggs, Vomit)
Protein stains behave like cooked eggs — when exposed to heat, they solidify and fuse permanently with fabric. This is why hot water is disastrous for these stains. Instead, cold water and enzyme-based cleaners break down the organic material safely. Sweat stains can oxidize into yellow marks, especially when combined with deodorant ingredients. The key is to treat protein stains gently but thoroughly before washing. More tips ➡️ How to Remove Blood Stains
5. Food Stains (Chocolate, Tomato Sauce, Curry, Berries)
Food stains typically contain multiple stain types: natural dyes, oils, sugars, and sometimes proteins. This combination makes them especially stubborn. For instance, tomato sauce stains contain carotenoids that resist bleaching, while chocolate has high fat content that needs degreasing first. These stains often require a two-step process — remove the oil first, then attack the color pigments.
See also ➡️ How to Remove Chocolate Stains
6. Makeup Stains (Foundation, Lipstick, Mascara)
Most makeup products contain oils and waxes that adhere tightly to fabric, especially soft materials like cotton or fleece. Foundation is notorious for leaving beige or yellow stains, while lipstick introduces both oil and dye, making it doubly stubborn. Solvents like rubbing alcohol and degreasers like dish soap are essential for these stains. Makeup stains can often be fully removed with the right layered approach.
7. Pet Stains (Urine, Poop, Vomit)
Pet stains introduce enzymes, bacteria, and ammonia into fabrics, which cause odor and discoloration. Standard cleaners often mask the smell temporarily but don’t break down the organic material. Only enzyme cleaners fully digest the compounds responsible for odor. Acting quickly prevents the stain from soaking into carpet padding or upholstery foam, where the smell becomes much harder to eliminate.
Pet odor removal ➡️ How to Remove Pet Urine Stains
8. Mold & Mildew Stains
Mold develops from prolonged moisture exposure and forms pigmented colonies that embed into fabric fibers. Mildew leaves grayish or black spots and has a musty smell. These stains require disinfecting as well as stain lifting. Sunlight, vinegar, and oxygen-based cleaners help, but delicate fabrics should be handled carefully. Mold stains often indicate broader moisture problems in the home.
9. Rust Stains
Rust is iron oxide, and it chemically bonds with fabrics in a way that water cannot dissolve. These stains require acid-based cleaners like lemon juice or vinegar, sometimes paired with salt to accelerate reaction. Using bleach on rust stains makes them darker and more permanent. Rust is among the few stains where acid is not only safe but necessary.
10. Grass & Plant Stains
Grass contains chlorophyll and other plant pigments that behave like dyes. These pigments cling to cotton and are difficult to remove without a color-lifting agent. Because they mix with dirt and oils from the skin, grass stains are stronger than they appear. Pre-treating with a combination of detergent and vinegar often works well.
11. Sweat & Yellowing Stains
Sweat stains form from a reaction between body salts, deodorant ingredients, and fabric fibers. Over time, they oxidize into deep yellow marks that require oxygen bleach or peroxide for removal. Heat from ironing or drying sets these stains even further. Treating them early prevents the yellowing cycle from becoming permanent.
12. Household Cleaning Stains (Bleach Spots, Dye Transfer)
Some “stains” aren’t stains at all — they’re color loss. Bleach spots remove dye permanently, meaning you cannot “clean” them away. Dye transfer (e.g., red shirt bleeding onto white clothes) may be reversible with specialty products. But true bleach damage requires recoloring or patching the fabric.
Stain Removal Framework (Works for 80% of Stains)
This universal framework gives you a proven sequence that resolves most stains safely. Even if you don’t know the stain’s source, this method minimizes the risk of making the stain worse.
Step 1 — Identify the Stain Type
Take a moment to observe: Is it oily? Colored? Thick? Does it smell? Does it harden when dry? These clues guide the correct cleaning method. Identifying the stain prevents unnecessary damage caused by using the wrong cleaner.
Step 2 — Remove Excess (Scrape, Blot, Lift)
If the stain has solids (chocolate, mud, food), gently lift them with a spoon or dull knife. For liquids, blot gently with a clean cloth. Never rub harshly — rubbing spreads the stain and embeds it deeper into fibers. Starting clean here ensures the later steps work much more effectively.
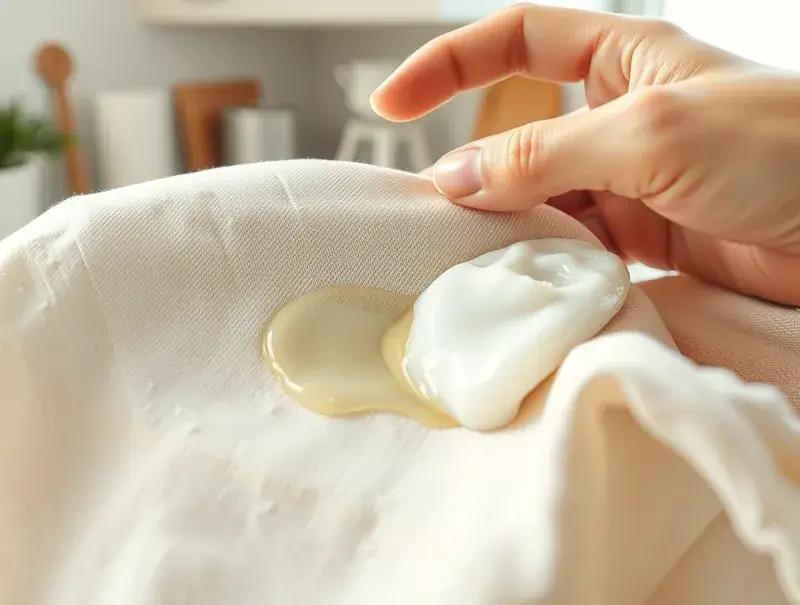
Step 3 — Apply a Pre-Treatment
Pre-treating dissolves or loosens the stain before you place the item in the wash. Depending on stain type, this may include dish soap, enzyme spray, vinegar, rubbing alcohol, hydrogen peroxide, or oxygen bleach. Massaging the cleaner gently into the fabric helps it penetrate deeper.
Step 4 — Rinse from the Back of the Fabric
Rinsing from the back pushes the stain out the direction it came in, instead of forcing it deeper. This technique is especially helpful for dye-based stains like wine or ink. Use low pressure at first, then increase as the stain loosens.
Step 5 — Wash According to the Care Label
The care label tells you everything: water temperature, agitation level, and whether the fabric tolerates bleach. Follow it closely for best results. Using the wrong wash setting can undo your pre-treatment work.
Step 6 — Air Dry First, Never Heat Dry
Heat sets stains permanently. Always check the stain before using a dryer or iron. If any trace remains, repeat the process. Air drying keeps the stain removable and prevents irreversible damage.
Stain-Specific Guides (Actionable Mini Tutorials)
These quick guides summarize the safest, most effective method to handle each category of stain. Each section offers a simplified version of the full stain-removal process but still provides enough detail to confidently tackle the problem. For deeper cleaning instructions, you can follow the links to the extended articles.
Beverage Stains (Tea, Coffee, Wine, Juice)
Beverage stains are tannin-based, which means they respond poorly to alkaline cleaners and heat. The first step is always a cold-water flush, pushing the stain out from the back of the fabric. A mixture of dish soap and vinegar helps break down both the pigment and any sugar residue. Red wine stains sometimes require repeated cycles of pre-treatment and rinsing because of their strong anthocyanin pigments. If treating white fabrics, hydrogen peroxide can safely lift lingering color.
Grease & Oil Stains
Oil stains behave differently from most other stains because they do not dissolve in water. Instead, they cling to fabric and create translucent dark patches that seem to grow over time. Start by blotting or scraping away any surface oil before applying a direct layer of dish soap — it works as an emulsifier, breaking down fats into particles water can remove. Massage gently and rinse with warm water, repeating until the stain disappears. Avoid using plain water first, as it can spread the oil further into the fabric.
More kitchen-related grease tips ➡️ How to Degrease Kitchen Cabinets
Ink & Marker Stains
Ink stains require solvents, not water. Water often spreads the ink, making the stain larger and harder to control. Place a paper towel behind the stained area and dab gently with rubbing alcohol, letting the pigment transfer onto the towel. Continue blotting until little to no color lifts, then rinse and wash. Some inks, particularly permanent markers, may need multiple rounds of treatment. Patience is essential with this stain category because ink molecules are designed to bond strongly with surfaces.
Blood, Sweat & Other Protein Stains
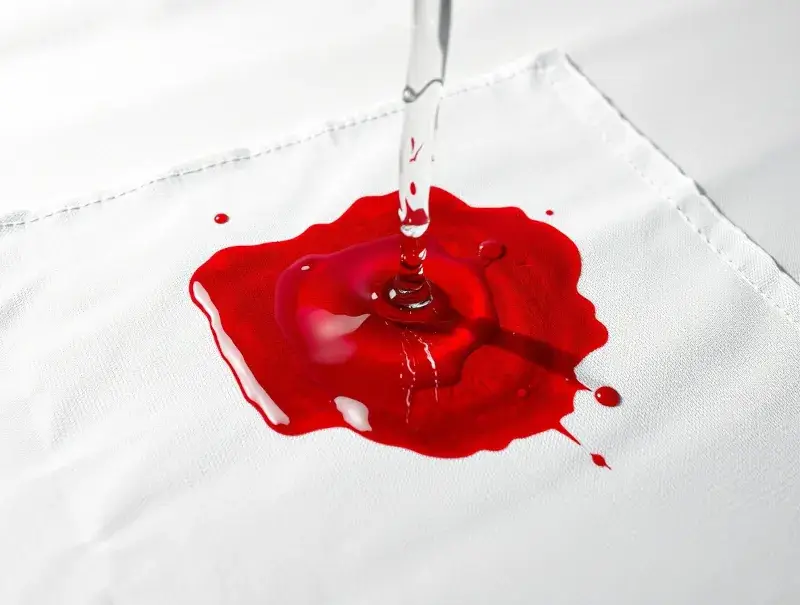
Protein stains are extremely sensitive to heat. Use cold water only — hot water cooks the protein and makes the stain permanent. Soak fresh stains in cold water for 10–20 minutes to loosen the organic material. For older or dried stains, apply an enzyme cleaner or a small amount of hydrogen peroxide (for white fabrics only) to break up the protein bonds. Gently rub the cleaner into the fibers and rinse thoroughly before washing. These stains often lighten gradually rather than disappearing instantly.
Chocolate, Tomato Sauce & Food Stains
Food stains are complex because they contain multiple components: oils, dyes, proteins, and sugars. Start by removing any solids, then pre-treat with dish soap to dissolve the oils. Rinse, then follow with an acidic cleaner like vinegar or an oxygen-based cleaner to lift remaining color. Tomato-based stains may require sunlight or repeated oxygen bleach treatments to fully fade. Heat should always be avoided until the stain has completely lifted.
Pet Stains (Urine, Poop, Vomit)
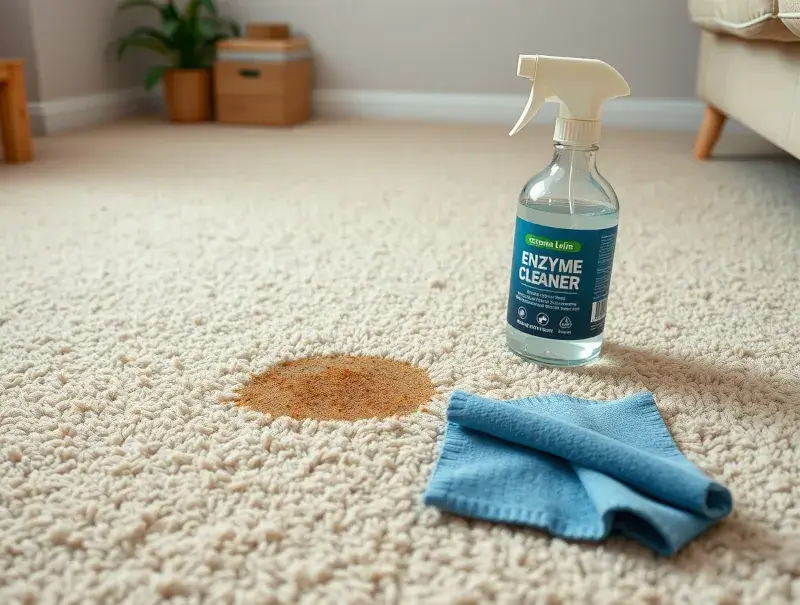
Pet stains introduce ammonia, bacteria, and enzymes that embed into fabric fibers. Blot as much liquid as possible before applying an enzyme cleaner — this step is essential because standard cleaners cannot break down the organic compounds responsible for the odor. Rinse thoroughly and repeat as needed. For carpets, ensure the cleaner reaches the padding underneath, where odors tend to linger. Once the area is clean, sprinkle baking soda to absorb lingering smells.
Stain Removal Mistakes to Avoid
Even the best stain-removal techniques can fail if common mistakes are made. These errors can set stains permanently or damage fabric, so understanding what not to do is just as important as knowing the correct steps.
Using Hot Water on Protein Stains
Heat is the enemy of protein stains. Hot water causes proteins to coagulate, binding them permanently to the fabric fibers. This is why dried blood or sweat stains often become darker and harder to remove after washing. Always start with cold water until you’re absolutely sure the stain is gone.
Rubbing Harshly Instead of Blotting
Many people instinctively rub a stain, trying to “scrub it out.” Unfortunately, this pushes the stain deeper into the fabric and can distort or thin the fibers. Blotting gently lifts the stain without forcing it to spread. For soaking fabrics, gentle agitation is far more effective than scrubbing.
Mixing Chemicals (Especially Bleach + Ammonia)
Household cleaning products may seem harmless alone but can create dangerous reactions when mixed. Bleach and ammonia produce toxic fumes that can irritate lungs and eyes. Even mixing bleach with vinegar can be harmful. Stick to one cleaner at a time, rinsing thoroughly before switching products.
Heat-Drying Before Stain Is Fully Removed
Dryer heat is one of the most common reasons stains become permanent. Once heat sets a stain, it becomes significantly harder — and sometimes impossible — to remove. Always check the stained area in good lighting before placing it in the dryer. If the stain remains even slightly visible, repeat the cleaning process.
Using Too Much Detergent or Cleaner
More cleaning product does not equal better cleaning. Excess detergent can saturate fabric and attract more dirt over time. Harsh chemicals, when overused, can weaken fibers or cause discoloration. Start with a small amount and increase only if needed.
Ignoring the Fabric Care Label
The care label is the single most important instructions guide for fabric. It tells you water temperature, bleach tolerance, and ironing settings. Ignoring these labels risks shrinking, fading, or damaging garments. Always start with the gentlest method unless the label clearly allows stronger treatments.
Stain Removal Cheat Sheet (Printable Quick Reference)
This chart summarizes the safest first steps for each major stain type. It’s designed to be printed or saved on your phone so you can quickly reference it during cleaning emergencies.
| Stain Type | First Step | Best Cleaner | Water Temp | Avoid |
|---|---|---|---|---|
| Coffee / Tea / Wine | Blot + cold rinse | Dish soap + vinegar | Cold | Hot water, scrubbing |
| Grease / Oil | Blot or scrape | Dish soap (emulsifier) | Warm | Plain water first |
| Ink / Marker | Dab with alcohol | Rubbing alcohol | Cool | Water (spreads ink) |
| Blood / Protein | Cold water soak | Enzyme cleaner | Cold | Heat of any kind |
| Tomato / Chocolate | Remove solids | Dish soap + oxygen bleach | Cool | Heat before stain lifts |
| Pet Urine | Blot deeply | Enzyme cleaner | Cool | Vinegar alone |
| Grass | Pre-treat with detergent | Vinegar + detergent combo | Cool | Using bleach on colors |
| Mold / Mildew | Sun + vinegar | Oxygen bleach (if safe) | Warm | Closed, damp storage |
| Rust | Lemon + salt | Acidic cleaners | Cool | Bleach (darkens rust) |
| Unknown Stain | Cold soak | Dish soap + vinegar | Cold | Heat, harsh chemicals |
FAQ — Everything You Want to Know About Stain Removal
What is the fastest way to remove a fresh stain?
The fastest and safest method involves blotting immediately, rinsing from the back of the fabric, and applying a mild cleaner such as dish soap. Acting quickly prevents the stain from sinking deeper into fibers. Most stains can be significantly reduced within minutes if treated correctly. Always avoid heat until you’re sure the stain is gone.
Why do some stains disappear when wet but reappear when dry?
This happens when part of the stain remains deep within the fabric. Water temporarily masks the residues, giving the illusion that the stain is gone, but once the fabric dries, the remaining pigments or oils return to visibility. To prevent this, always pre-treat thoroughly and inspect the fabric after air drying.
Can I use hydrogen peroxide on colored fabrics?
Hydrogen peroxide is a mild bleaching agent, so it may lighten or fade colored fabrics. Always perform a patch test on an inconspicuous seam before applying it to the stain. If the fabric shows any color distortion, switch to enzyme-based or detergent-based treatments instead.
Why does hot water make some stains worse?
Heat accelerates chemical bonding between stain molecules and fabric fibers. For protein stains like blood or sweat, it “cooks” the proteins, permanently setting them into the fabric. This is why soaking in hot water too early can turn a removable stain into a permanent one.
How do I safely handle stains on delicate fabrics like silk or wool?
Delicate fabrics require the gentlest possible approach. Avoid strong chemicals, aggressive rubbing, or extreme temperatures. Use mild detergents and soft blotting motions. When in doubt, consult a professional cleaner, especially for expensive or sentimental pieces.
Why do sweat stains turn yellow over time?
Sweat stains turn yellow due to oxidation — a chemical reaction between body salts, deodorant ingredients, and oxygen in the air. Heat from ironing or drying accelerates this process. Pre-treating sweat stains early and washing regularly helps prevent the yellowing cycle.
Are natural cleaners like vinegar and baking soda always safe?
They are generally safe but not universal. Vinegar is acidic and can weaken delicate fibers or remove color from some fabrics. Baking soda can leave residues in dark fabrics. Always use them judiciously and test in an unseen area when working with sensitive materials.
What should I do if I don’t know what caused the stain?
Start with the safest universal method: cold water + mild dish soap. This removes most categories of stains without setting them. If color remains, treat it as a dye stain using vinegar or oxygen bleach. If the stain feels greasy, follow oil-removal steps. Identifying the stain’s texture and behavior is key.
Final Thoughts — Your Complete Guide to Removing Any Stain
Stains may look intimidating, but once you understand how they behave and how to treat them, they become manageable. This encyclopedia gives you the foundation you need to approach any stain with confidence — whether it’s a tricky oil spill, a stubborn coffee blot, a surprise pet accident, or a pen explosion inside your bag. With the right method, most stains are fully removable, and even old stains can often be revived with patience.
To continue learning more home-care essentials and cleaning techniques, explore these related guides:
➡️ How to Remove Beverage Stains
➡️ How to Remove Grease & Oil Stains
➡️ How to Remove Ink & Marker Stains
➡️ How to Remove Blood Stains
➡️ How to Degrease Kitchen Cabinets
➡️ Kitchen Cleaning Master Guide
Keeping your home clean doesn’t need to feel overwhelming — especially when you have the right tools and knowledge at your fingertips. With this encyclopedia as your reference, you’re fully equipped to handle any stain life throws at you.