Tile floors are durable, versatile, and naturally beautiful — but they can also be surprisingly tricky to keep spotless. Many homeowners assume that as long as they mop regularly, the tile will stay clean and shiny. Yet in reality, tile floors often end up looking cloudy, feeling sticky, or showing streaks even after a fresh cleaning.
You might have experienced this yourself: you finish mopping the kitchen, step back to admire your work, and think,
“Why does it still look dull? Did I do something wrong?”
The truth is, tile floors require the right tools, the right method, and the right cleaning formula. Once you understand how tile surfaces interact with residue, dust, oils, and moisture, cleaning becomes dramatically easier and the results become visibly better.
This comprehensive guide will walk you through how to clean tile floors the correct way, including daily routines, deep cleaning methods, grout care, and common mistakes to avoid. Whether your tiles are ceramic or porcelain, these steps will help restore their natural shine and freshness.
If you’re building a full cleaning routine for your home, this guide is part of our ultimate floor and carpet cleaning guide, where we cover tile, hardwood, laminate, carpet, and upholstery care in detail.
Why Tile Floors Become Dull, Cloudy, or Sticky
Tile floors can look simple, but the combination of tile surface + grout + everyday contaminants makes them more complicated than they appear. Understanding why tile gets dirty helps you prevent the same issues from coming back.
1. Soap or Cleaner Residue
Soap residue is one of the biggest reasons tile looks cloudy after mopping. When too much floor cleaner is used, the product doesn’t fully dissolve or rinse off. Instead, it dries into a thin film on top of the tile surface. This film attracts dust, making the floor look dull and feel sticky even though you just cleaned it.
Residue also builds up over time. A little bit today, a little bit tomorrow — and after a few weeks, the shine disappears entirely. Many people respond by adding more cleaner, which only makes the problem worse. The key is understanding that tile floors need very little cleaning solution.
2. Dust, Oil, and Daily Household Activity
Even if your home looks clean, microscopic oils and dust constantly settle on tile floors. Kitchens naturally produce small oil particles from cooking, and these particles spread with foot traffic. When oil meets dust, it forms a subtle gray film that sticks to tile.
In high-traffic areas, such as entryways or living rooms, shoes bring in outdoor debris that clings to tile surfaces. Sweeping alone may not remove this film, which is why tile sometimes stays dull until you deep clean it properly.
3. Dirty Mop Water Re-Deposits Dirt
One of the most overlooked cleaning mistakes is failing to change mop water often enough. Once the mop water turns cloudy, each dip into the bucket transfers dirt back onto the floor. This is why streaks appear even after a full cleaning session.
Dirty mop water not only affects shine but also creates sticky patches, smudges, and uneven textures. Using a two-bucket system dramatically improves results and keeps the cleaning water fresh.
4. Grout Lines Collect Dirt Quickly
Even if your tile surface is clean, dirty grout makes everything look older and less hygienic. Grout is porous, which means it absorbs dust, spills, and detergent residue easily. Once grout becomes dirty, it highlights the contrast with the tile and gives the floor an overall dingy appearance.
Keeping grout clean is essential if you want tile to look consistently fresh and bright.
Tools and Products You Should Use for Tile Floors
The right tools make a huge difference in cleaning results. You don’t need expensive gadgets; you just need tools that match the nature of tile surfaces.
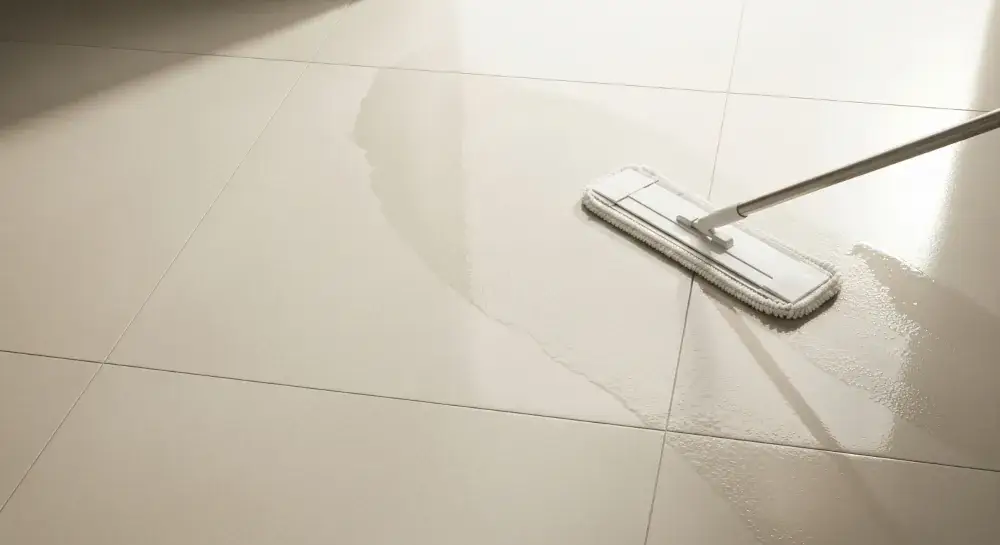
Microfiber Mop
A microfiber mop traps dirt, dust, and oils far better than cotton mops. Microfiber fibers use static attraction to lift particles instead of pushing them around. This helps remove residue from the surface rather than redistributing it.
Cotton mops, on the other hand, often leave lint behind and spread dirty water across the floor. Microfiber also dries faster, reducing streaks.
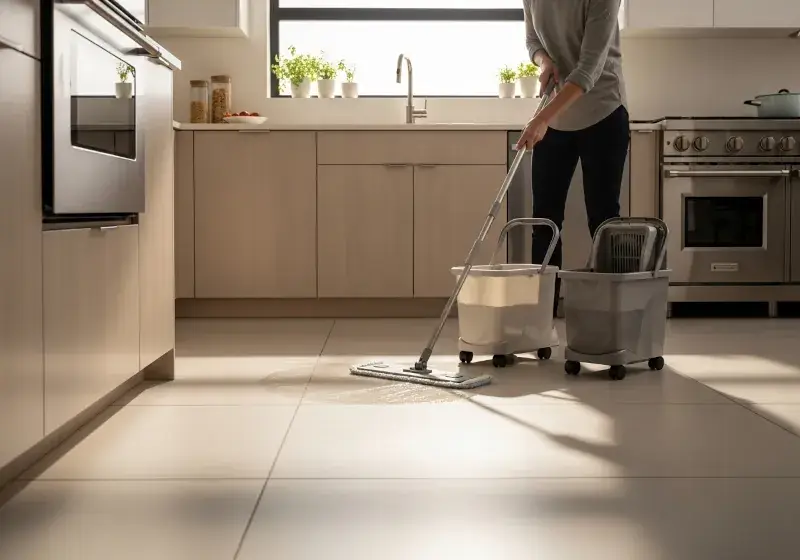
Two-Bucket Cleaning System
Using two buckets is one of the most effective professional cleaning tricks.
Bucket A contains fresh cleaning water.
Bucket B is used exclusively for rinsing the mop.
This prevents dirt from re-entering the clean water and gives you a much cleaner finish. Professional cleaners rely on this method because it dramatically reduces streaks and makes tile floors shine more evenly.
Vacuum With Soft Brush Attachment
Sweeping is helpful, but a vacuum removes far more dust, crumbs, and grit from tile surfaces. Grit can cause micro-scratches when dragged by a mop. Using a vacuum before mopping ensures the surface is ready for wet cleaning.
A soft-brush attachment prevents scratching on glossy tile finishes.
pH-Neutral Tile Cleaner
Tile surfaces respond best to pH-neutral cleaners that lift residue without damaging the finish. Harsh or acidic cleaners may etch the surface or dull the tile over time. A mild, pH-balanced solution maintains tile color, texture, and shine.
Always choose a cleaner specifically labeled for ceramic or porcelain tile.
Baking Soda for Spot Cleaning
Baking soda is gentle but effective for sticky spots or small stains. When mixed with water into a paste, it lifts residue from tile without scratching or discoloring it. It’s especially useful in kitchens where spills tend to harden on the floor.
Cleaners and Tools to Avoid
Some products are unsafe for tile maintenance, especially if used regularly:
- Bleach for daily use (very harsh on grout)
- Ammonia (can cause discoloration)
- Abrasive powders (scratch glossy tile)
- Highly acidic cleaners (unsafe for stone tiles)
Not all tile is the same. Natural stone tiles like marble and travertine require specialized care. If your tiles are natural stone, avoid vinegar entirely.
How to Clean Tile Floors (Daily Routine)
Daily or weekly cleaning keeps tile fresh and prevents buildup. This method works for kitchens, hallways, living rooms, and bathroom tile.
Step 1: Sweep or Vacuum Thoroughly
Always begin by removing surface debris. Even small grains of sand or dust can create streaks when mopped over. Vacuuming is ideal because it picks up fine particles from corners and grout lines.
If you skip this step, your mop will push dirt around, and the floor will never look fully clean.
Step 2: Prepare Fresh Mop Water
Fill a bucket with warm water and add only a small amount of tile cleaner.
Most people use too much cleaner, which causes sticky residue.
Fill a second bucket with clean water for rinsing. This ensures that each mop pass uses clean solution, not muddy water.
Step 3: Mop Using Straight, Gentle Strokes
Dip the mop into the cleaning water, wring it out until it’s damp — not soaking wet — and start mopping in straight lines. Circular motions tend to spread dirt unevenly and leave streaks.
Mopping in lines helps you cover the surface methodically and ensures no patch is missed.
Step 4: Rinse the Mop Frequently
After every small section, dip the mop into the rinse bucket. This removes dirt and keeps the cleaning process consistent. If your rinse water becomes dirty, replace it immediately.
A clean mop means a clean floor.
Step 5: Allow the Floor to Air-Dry
Tile dries quickly because it does not absorb water. To speed things up, you can open windows or turn on a fan.
If streaks appear, wipe the area with a damp microfiber cloth to blend them out.
How to Deep Clean Tile Floors (For Shine Restoration)
Deep cleaning helps restore tile shine, remove residue, and eliminate stubborn films left behind by old cleaners.
Method 1: Remove Soap Residue
If your tile feels sticky, a mild dish soap solution can break down old residue. Mix warm water with a tiny amount of dish soap (½ teaspoon is enough). Mop the floor with this solution, then rinse with clean water.
This resets the tile surface and removes weeks of buildup.
Method 2: Baking Soda Paste for Sticky Spots
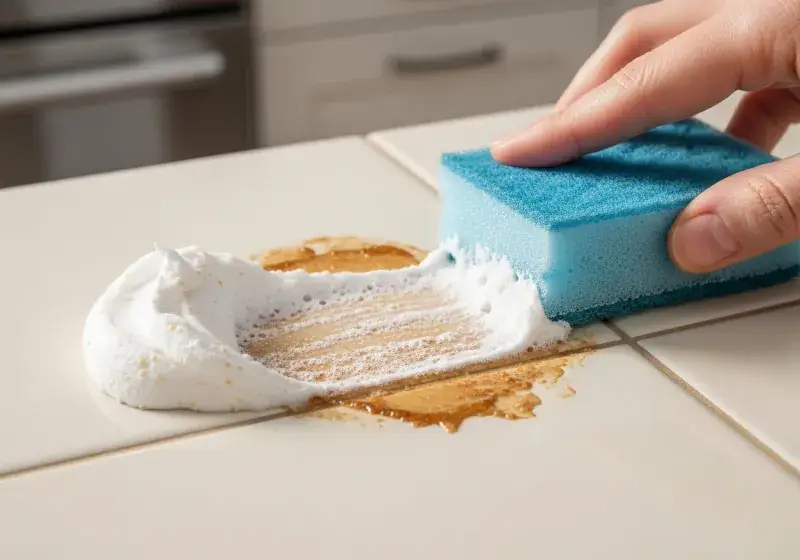
For patches of grease or sticky spills, apply baking soda paste and scrub gently with a sponge. Baking soda lifts residue without scratching your tile. Rinse thoroughly afterward.
Method 3: Degreasing Kitchen Tile
Kitchens accumulate invisible oil film over time.
Mix warm water and a drop of dish detergent, mop the floor lightly, and rinse with clean water. This helps restore shine in cooking areas.
How to Clean Tile Grout Properly
Grout lines dramatically affect the overall look of your tile floors. Even if the tile is spotless, dirty grout makes everything appear old.
Baking Soda and Water Paste
Spread baking soda paste across grout lines and scrub with a toothbrush or grout brush. The mild abrasiveness pulls out embedded dirt but does not damage the grout.
For best results, let the paste sit for 10–15 minutes before scrubbing.
Using a pH-Neutral Grout Cleaner
If grout is heavily stained or hasn’t been cleaned for months, a store-bought grout cleaner may be necessary. Apply according to instructions and rinse thoroughly.
Always avoid bleach on colored grout — it can cause uneven fading.
Common Mistakes to Avoid When Cleaning Tile Floors
Mistake 1: Using Too Much Cleaner
Excess cleaner dries into residue that attracts dirt.
The less product you use, the cleaner the tile will look.
Mistake 2: Mopping With Dirty Water
If your mop water turns gray, change it immediately. Dirty water creates streaks and sticky patches.
Mistake 3: Harsh Cleaners on the Wrong Tile
Vinegar and acidic cleaners should never be used on natural stone tile. They cause erosion and dullness.
Mistake 4: Abrasive Scrubbing Tools
Steel wool, rough scrub pads, or abrasive powders can scratch glossy tile surfaces permanently.
Maintenance Tips to Keep Tile Floors Looking New
Mop Once or Twice Per Week
Consistent maintenance prevents buildup. If you have children, pets, or a busy kitchen, you may need to clean more frequently.
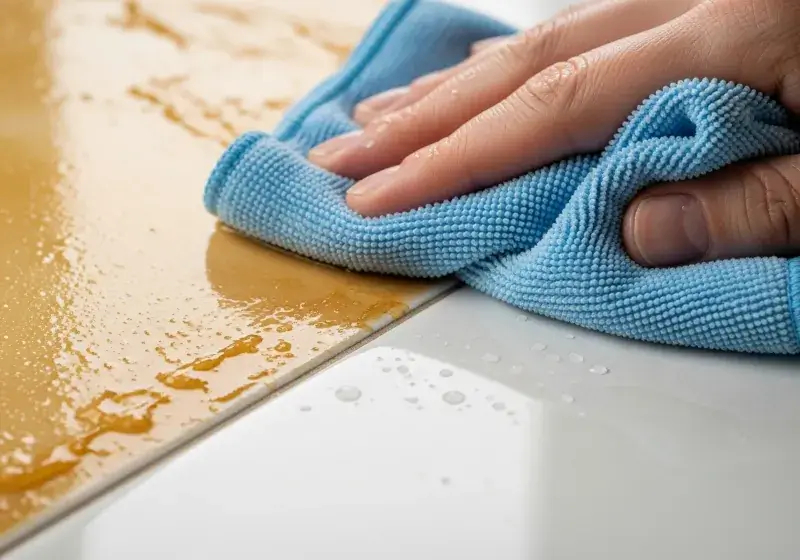
Spot-Clean Spills Immediately
Sugar, oil, and colored liquids stain grout quickly. Wiping them immediately prevents discoloration.
Use Mats in Entryways
A simple doormat traps dirt and grit before they reach your tile.
Buff With a Dry Microfiber Cloth for Extra Shine
After mopping, you can buff dull areas with a dry microfiber cloth. This brings out the natural sheen of the tile without chemicals.
Using Steam Mops on Tile Floors
Steam mops are excellent for ceramic and porcelain tile as long as your grout is sealed. They sanitize without chemicals and lift residue with heat.
If the grout is unsealed, steam may weaken it over time.
For a comparison of tools, see Mop vs Steam Mop: Which One Should You Use?
Frequently Asked Questions (FAQ)
Why does my tile floor look cloudy after mopping?
Most cloudy tile is caused by residue from using too much cleaner. Rinse the floor with clean water or deep clean with a mild soap reset.
Can I use vinegar on tile floors?
Yes, but only on ceramic or porcelain tile — never on natural stone. Even then, use it sparingly because frequent acidic cleaning dulls tile over time.
How often should I deep clean tile floors?
Every 2–4 weeks depending on household traffic, pets, and kitchen activity.